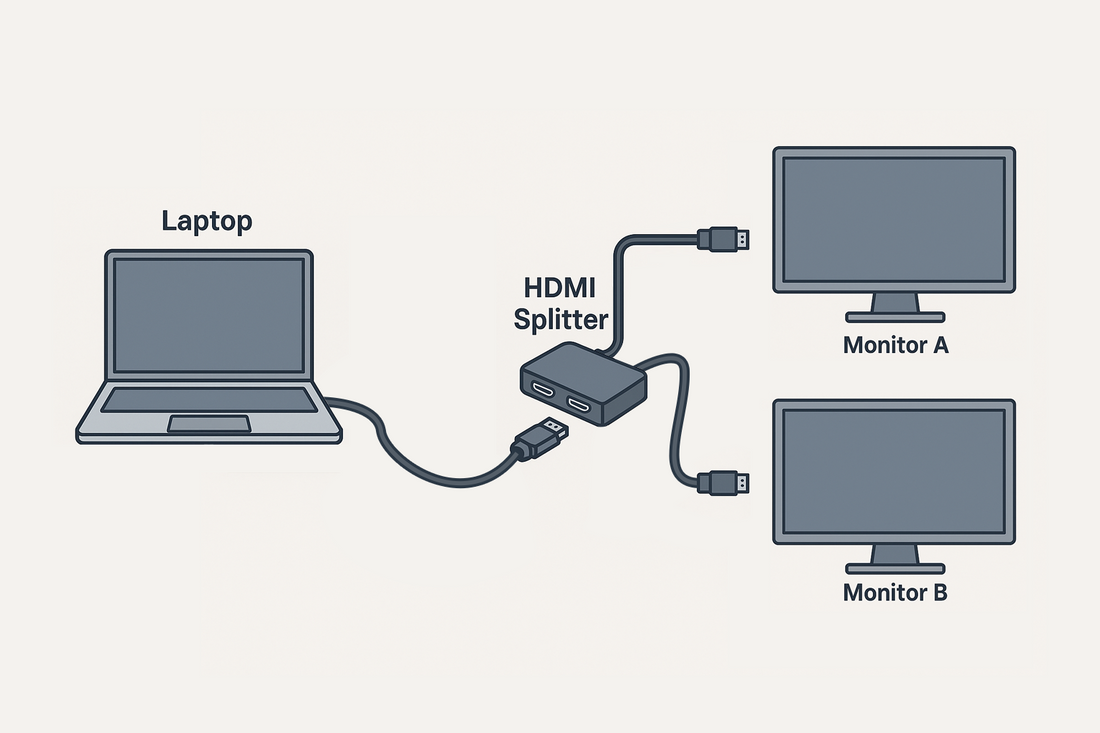
How to Connect Two Monitors to a Laptop
Share
TL;DR (Quick Take)
- Want “mirror mode” → Use a 1-in-2-out HDMI splitter (duplicates the same image to both screens — simplest option)
- Want “extended mode” → Use a USB-C/Thunderbolt docking station or HDMI + USB-C combo output
- Always: use certified HDMI 2.0/2.1 cables and configure resolution/refresh rate correctly in your OS.
1) Check Your Laptop’s Ports & GPU Capability
- Ports to look for: HDMI, USB-C (with DisplayPort Alt Mode), Thunderbolt, Mini DisplayPort
- GPU limitations: Many thin laptops natively support only one external display; you’ll need a dock or combo output for two screens.
- Avoid the pitfall: USB-C doesn’t always carry video — it must support DisplayPort Alt Mode; HDMI version affects whether you can run 4K@60 / 4K@120 / 1080p@144.
From our own customer support logs: the most common mistake is expecting a basic HDMI splitter to “extend” two screens. Standard splitters can only mirror the same image.
2) Choose the Right Method: Mirror vs. Extend
Method A | HDMI Splitter (1-in-2-out) → Mirror
- Use case: Training, presentations, trade shows, digital signage, home theater
- Setup: Laptop HDMI → HDMI splitter → two displays
- Note: Most basic splitters support mirror only (same content).
Method B | USB-C/Thunderbolt Dock → Extend
- Use case: Remote work, multitasking, content creation
- Tip: Choose a dock with two video outputs (HDMI/DP) and confirm your OS + GPU support extended mode.
Method C | HDMI + USB-C Combo → Extend
- Use case: Laptops with both HDMI and USB-C (DP Alt) outputs; one port per monitor.
Method D | Wireless HDMI (+ one wired)
- Use case: Conference rooms or large living spaces; wireless HDMI sends one display signal without long cables.
3) Connecting & Configuring in the OS
Recommended connection order (for stability):- Power the dock or active splitter
- Connect the monitors
- Connect to the laptop
- Windows: Right-click desktop → Display settings → Identify & Arrange → Choose Duplicate or Extend
- macOS: System Settings → Displays → Arrange → Check/Uncheck “Mirror Displays”
- Match each monitor’s native resolution
- For high refresh rates, use HDMI 2.1/UHS certified cables
- Mixed-resolution mirroring may require setting the source to 4K@60 or 1080p@60 for stability.
Reference: HDMI 2.0 supports 4K@60; for 4K@120 or 8K@60, ensure your GPU → cable → monitor chain all support HDMI 2.1 / 48Gbps.
4) Common Issues & Quick Fixes
- Only one screen works / no signal: Use shorter, high-quality cables; check monitor input; power active devices with 5V.
- Flickering/black screen: Bandwidth limit or refresh rate too high — test with 4K@60/1080p@60.
- Streaming blocked: Check HDCP 2.2/2.3 compatibility; older cables/devices can cause DRM errors.
- Different resolutions: In mirror mode, output matches the lowest shared spec — normal behavior.
5) When to Pick (and Not Pick) a Splitter
- ✅ Pick a splitter: You only need mirroring (teaching, exhibitions, signage, simple duplication)
- ❌ Don’t pick a splitter: You need two different screens → use a dock or combo output.
6) Scenarios
- Conference mirroring: Laptop HDMI → 1→2 splitter → podium monitor + projector; no window swapping mid-presentation.
- Live streaming preview: Streamer mirrors output to a secondary monitor for team review; extended mode via dock if running multiple apps.
- Photography client review: Camera/PC output → HDMI splitter → client display + technician monitor. In many cases, cameras output via mini HDMI, so you may need a mini HDMI to standard HDMI adapter to connect smoothly.
- Gaming setup: Connect your gaming laptop or console to an 8K HDMI splitter for gaming. One output drives your high-refresh gaming monitor (4K@240Hz[DSC]/4K@120Hz/8K@60Hz), while the other mirrors gameplay to a large-screen TV for friends or streaming — without lag or signal loss.
Conclusion
Connecting two monitors to a laptop is straightforward once you decide between mirror and extend. HDMI splitters are the easiest path to identical displays; docks or combo outputs deliver true extended desktops.